Building Bridges with Little Coders

What has been happening with my Little Coders? Well, we have been building bridges! A little step into STEM, sort of, though not based on a real life purpose but working to a set criteria. We have once again challenged ourselves and learnt a lot along the way.

Like most of us who are learning as we go, we made mistakes along the way and one mistake was a whopper! So here is how to do it or not, and suggestions on what I would do should I endeavour to teach this project again.

My initial goal was to create a project for the students which was more hands on and gave students the opportunity to delve into Design and Technology, STEM (in particular Math and Engineering), plus expand their knowledge and skills on using the Ozobots (for Digital Technology). A word of warning, it took the whole term! If you are a classroom teacher definitely integrate the project into your other learning areas, if you are a specialist teacher consider negotiating with other teachers (in the learning areas covered) and work collaboratively on the project.

The plan was to have students design and create a track for the Ozobots to travel, the track needed to incorporate a bridge. Sounds simple, doesn’t it? Yes, that is what I thought. How hard can it be getting two dozen Year 2/3 students to make a track? They’ll have fun cutting, gluing, constructing and evaluating their work as they create. They’ll be immersed in Math without realising it. A lot of critical thinking will be required and we will be building capacity and perseverance. It will be great and it was, almost every student was engaged, students who normally struggle academically worked tirelessly to complete their tracks and demonstrated their creative skills. Our more advanced students delved into higher level bridge building and set themselves challenges, and only one student did not complete their track in the timeframe.

So, how did we start? We began by discussing the project together and as a class, we set the basic criteria.

  • What the minimum length of the track could be?
  • What materials we could use and what was available to us?
  • What did we need to consider regarding the Ozobot? Suitable surface awareness for traversing the track.
  • What type of bridges could we make? What materials would be suitable?
  • How do we set out our track, in relation to the Ozoblockly codes available? The degrees and movements which Ozobot can travel. Can we make curved tracks?

We then began designing our tracks and bridges. Once students had drawn up both their track design and bridge design we got into the hard stuff. We had used 1cm graph paper for our track design, we then needed to work out how to scale up our design to meet the needs of our Ozobots. How wide must the track be? How big would a 1cm block need to scale up to? This linked in well with arrays which they had been learning in Math. Most students chose to scale up to 5 x 5, some went with 5 x 6.

Then we had the challenge of using a ruler to measure and draw our track blocks onto graph paper. This was a surprise to me, very few had any idea how to measure and rule accurately. I had intentionally decided to use the graph paper to make it easier and quicker for students but even then we were challenged, it required explicit teaching (several times over). Once students understood the process and the most effective and quickest way to rule up the paper they quickly got into production mode, cutting long strips of 5cm wide graph paper.

The students then began glueing their track onto the cardboard base. They needed to refer back to their original design as they worked, making sure they identified the starting point and the direction. It is important at this stage that you remind/teach students about left and right. I get the students to physically move when checking which direction they need to glue the track. Have them face the start direction and follow the turns by changing the direction they are facing with each turn. A lot of arm waving and jumping is involved along the way, we could direct flight traffic!

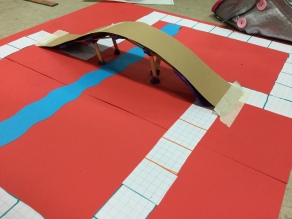
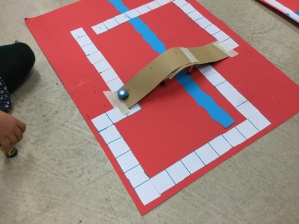
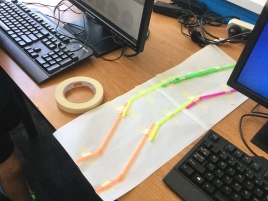
After several lessons, they had their tracks glued down and we got started on our bridges. It was at this stage that we realised bridges are designed to go over something and most students chose to add a blue paper river to their track.

The students had chosen a selection of materials to build their bridges and some changed their initial selection along the way as they discovered some materials were not suitable or there were construction problems during the making process. Several students hooked onto the successful ideas of others and completely changed both their bridge design and the materials used.

2017-06-22 14.05.24

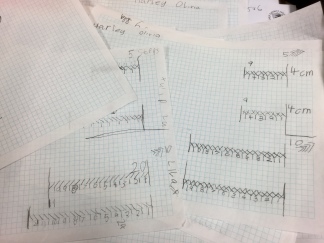
Once our tracks were completed the students began their initial programming challenge by creating the sequence required (for the Ozobot to traverse their track) on paper. To make it quicker and easier to scribe our sequence we use a few symbols and abbreviations. I always feel a little mean doing this, making them write it out by hand, but it makes them really think about which codes they will need to use when they get to the block coding stage. It also makes it easier for them to use as a reference when creating their sequence on the computer and helps them identify any errors. What have I missed out? Did I select the correct direction (degree) code?


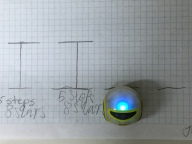
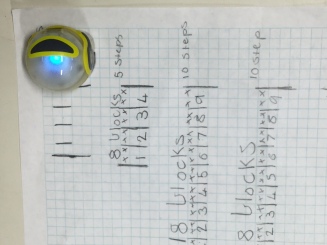
The first step, in order to write down our sequence, is to work out how far is an Ozobot step? I have them run a test on a piece of graph paper and turn this into an Ozobot ruler (10 Ozobot steps). They can then use the ruler to mark the distance Ozobot travels (10 Ozobot steps) and calculate the number of steps they need to include in their sequence for each straight length of the track. *Note: I use 10 Ozobot steps as most students know their 10 times tables and can count by tens. When a length of the track goes over, for example, 48, they use the ruler to mark to 40 and then use the ruler to estimate how many more steps to the centre of the last block in that track section (this is the corner block where they then include a turn/degree code).

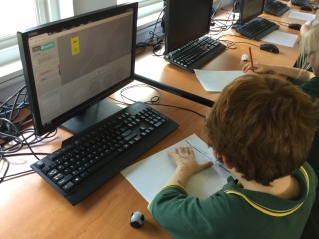
When the students finish their written sequence, we look at it together, comparing it with their track. I then sent them off to the computer lab to independently use the Ozoblockly software, create their code sequence and load the programme onto the 2017-06-29 13.57.25
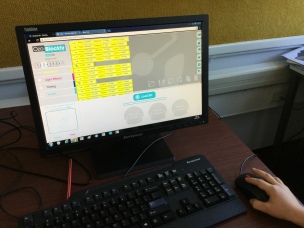
Ozobot. Are you shocked? What? Independently? By themselves? Alone? Well, yes. This class has had two or three semesters (over two-three years) of using block coding software. There are a few students who are not as capable but the other students become the teachers and they support each other. Now, the why of how this happened. When we started the project we (the class) realised there was no way we could construct our tracks in the computer lab, there just wasn’t the room. Luckily, being the Visual Art specialist I had access to the art room and so we used this space for most of the term. It meant that it freed up the computer lab and I happily let another class use it in that time frame. When my students began to finish at different stages and needed access to a computer, I arranged with the other teacher to send them through to the computer lab and she was happy for them to be in the same space as her class. It wasn’t any burden to her as the students knew what to do.

It was a little crazy, however, I had students at all different stages of production and coding. I did have to move between both classrooms to support and check on progress. I had students moving back and forth between the computer lab to code and the art room to test run their program using the Ozobots. There were only a few minor BM issues as most students were excited about testing the robots on their track and eager to fix any errors and then celebrate any successes. Any staff passing the art room were ambushed by students and dragged into the room to witness what the students had achieved.

2017-06-29 13.53.53

Now, here’s the kicker and what went wrong, big time! The error was completely my fault and I should have thought about the potential outcomes when planning the project. We did not have many successes 😦

Why? Well, Ozobots cannot handle traversing bridges! Most students did a great job creating the correct sequences to get the Ozobots to stay on track but when presented with a bridge the Ozobot would either stop completely or only move up and across the bridge for a very short distance. The reason being often the angle of the bridge was too steep for the Ozobot to traverse, and/or they are not designed for traversing bridges. Occasionally one would make it to the centre of a bridge (if it had been constructed at a suitable low angle) but then it would just slide down the other side…which created lots of laughs but was not the goal. No one really minded and there was lots of discussion on how we could make changes to the bridges and we hypothesised about why it might be happening. No one was disappointed (except me), we had all enjoyed the process and learnt a lot along the way but if we had had more time we would have experimented further and tried to solve the problem.

What I learnt from it:

  • run some tests before you set the project (if you want success)

or

  • go with the flow and learn together, the process can teach you and your students more than you expect.


Advertisement

Talking Devices

Let’s talk about which devices for which age group. During March, I attended a Digital Technologies 7-10 professional learning workshop which deconstructed the Western Australian Curriculum. It was a great opportunity to see what other teachers were doing in their schools and how they interpreted the DT curriculum.  For myself, one of the presenters, Maria D’Cunha from Hampton SHS, shared a story that gave me some confidence in how my journey was progressing. Like many of us, Maria was building her own Digital Technology skills and knowledge, she acknowledged that she was also learning, and not just her students. However, the biggest thing which she shared and which hit home for me was that she knew her students, she recognised that coding was something that many of her students knew nothing about and she started from that point. It didn’t matter that they were high school students, she gave them time to play and experiment with devices which many have labelled as being useful only for Early Childhood and Junior students. In Maria’s case, the devices available were BeeBots. BeeBot_blinking

So, why is this a big deal? Well, in my journey I have sat and listened to many teachers sharing their stories, and I have listened to the expectations of those developing the WA Digital Curriculum, and the message in some cases has been that within a high school setting students should be learning and using a scripting language. Now, this is doable for those students lucky enough to have had experienced a thorough ICT background with a passionate, qualified teacher and the available hardware/resources but not all students have had this opportunity. In fact, many students may not even have access to a computer or device at home, nor internet access. Starting your program at a lower level is ok and will give students time to develop the confidence, skills, and knowledge which they need. I am not saying don’t challenge students just put some time into introducing the basics, give them time to experiment and explore the new devices, software, and applications, before setting higher level tasks. We want students to develop a passion for Digital Technologies and not be turned off and frustrated by attempting tasks beyond their initial abilities.

So, what do you start with? If you are lucky enough to be in a DETWA Primary or District High school you would have received in Semester Two, last year, a Digital & Design Technology kit filled with robots and maker gadgets. This came with a document outlining which device/gadget was suitable for which age group, very handy for getting started. However, many schools are still in the process of purchasing suitable devices and it is a little confusing as to what may work for which age group. What can be recommended on device websites may not always work in the classroom setting or be appropriate for the curriculum. If you are hoping to reduce that frazzled teacher feeling (wishing you had extra limbs to be able to help all students at once) and you want students working independently with devices, it is worth putting in some time doing a little research.

My suggestion is to use your teacher network to gather information from those in the know who have used the devices and have hands on experience using them in the classroom. Having used several robots and devices myself I thought I would share my devicesopinion and what I had been advised by other educators in my professional network. I have created a document that compares the advice of the companies, DETWA and those in the classroom. If you are interested you can access it here in the curriculum resource page. It is a work in progress and if you feel you could contribute further information based on experience please take the time to email me. All suggestions and advice would be very welcome and helpful in completing the document.

Please remember that this is based on personal experience and just a suggestion, your own experience and the experiences of others may be completely different due to many factors, including student prior knowledge and the reliability of the technology infrastructure within your school.

Books for Little Bots

Over the last six weeks, I have attended several Digital Technology professional development workshops and met some great teachers. One of the discussions which keep popping up is the integration of digital technologies into other subject areas. It is becoming a necessity due to the limited availability of DT specialist staff in most schools, and the crowded curriculum which is stretching classroom teachers to the limit, best not even mention the two hours of LOTE which we will soon have to cram in as well!

So, to ease the pressure on us all let’s look at texts which could be useful in supporting DT knowledge and skills in Early Childhood and Junior classes, and which may be used as a hook for other teaching areas. Now we all know that robots are not an essential component of teaching digital technologies, however, they are a very good way to hook students into wanting to learn and participate. With this in mind, I began researching what robot themed text is available and how it might fit into other subject areas.

Here’s what I found which looked useful…

STORY BOOKS TO READ:

  • Robots, Robots Everywhere (Little Golden Book) by Sue Fliess.robots robots everywhereThis cute little book could be used as a hook to get students thinking about robots in our world, where do we find robots? Do we use robots in our daily life? Students could select a real world robot and draw/write about what it does, perhaps create a flow chart which outlines the steps/sequence that a real world robot goes through. Or use it as a hook for writing a narrative about working with a robot, then have students illustrate their work (labeled diagram or artwork), or perhaps build a robot sculpture.
  • Power Down, Little Robot by Anna Staniszewski. This is a good text to introduce power down
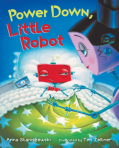
algorithms, a sequence for a procedure. The book is about a little robot who does not want to go to bed, he runs through his stalling program to avoid going to bed, something which all young children can relate too. Students could write and illustrate their own bedtime routine, which also fits into the health curriculum. This text also has a song and mentions some technology terms: error messages, circuit, power modules, and sequence.
  • The Robot Book by Heather Brown. The hardcover book has interactive parts which the robotcan be moved, such as, spinning cogs. With only 5 pages, it outlines the very basic parts of a robot for little children, in the search for the most important part (the heart). What is the heart of a robot? Useful for ECE classes when designing a robot, and could be used for covering social and emotional content. It could also be used with older students as a sample of how to design a book with moving parts.
  • The Robot and the Bluebird by David Lucas. robot and bird
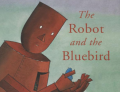
An emotional story about an old robot who can’t be fixed but finds a way to save a bird. A story that can open many discussions and writing tasks. Warning: You may need tissues.
  • Pete the Cat: Robo-Pete by James Dean. Pete the Cat builds a robot, he programs the robot to be like him in order to have someone to play the games he likes. Mentioned is Robo Pete having a homing device, which you robo pete
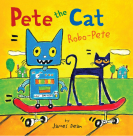
could use to open a discussion about mapping and GPS, students could create a story map of the text or develop their own grid ‘hide & seek’ map of the playground or school. Where would you hide? Students could code a path using directional arrow symbols and direct a robot friend to the secret spot. Or use the gridded maps to play a game similar to battleships, can you find the hiding spot?
  • Sometimes I Forget You’re a Robot by Sam Brown.forget your a robot This is a lovely story about friendship and could be used in ECE to develop student awareness regarding how we speak to people in a positive way and how we are all valuable in different ways, plus jobs that robots could do.
  • The Three Little Aliens and the Big Bad Robot by Margaret McNamara. This is an adaption of the famous ‘Three Little Pigs’, it would work well in a text comparison activity (with a Venn diagram) and lends itself well to incorporating any space travel activity. The end pages show the planets, all labeled with their names. Not really useful for DT but I really liked the big bad robot and his scary face.
  • R Is for Robot: A Noisy Alphabet by Adam F. Watkins. r for robot
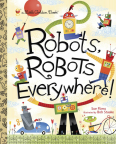
Another text with great robot illustrations, each letter of the alphabet has words which describe sounds. It would be great for any narrative writing task or animation project where students were being encouraged to include sound within their text. Watch this clip to get an idea of the content.
  • Clink by Kelly DiPucchio. clink2This book has lovely end clinkcovers illustrated with very detailed plans of how to build a robot, a great example to show students and encourage them to add detail to their diagrams. The story line features an outdated robot whose programs no one wants and how he tries to gain the attention of the shoppers in hope of being purchased.
  • Little Robot by Ben Hatke, little robot
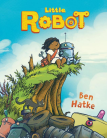
is a graphic novel suitable for junior and middle school students. This text is a perfect hook for comic book making, students could create their own comic book text using an iPad application or website. Comic book creation is a great way to demonstrate creating a sequence. See Ben being interviewed and talk about his artwork.

MAKING BOTS BOOKS

  • Cool Robots by Sean Kenney. LEGO extraordinaire Sean Kenney has developed a few cool robots 2
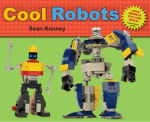
texts with instructions for building simple robots. You will need to check his block list and make sure you have the required pieces, otherwise, use the text as inspiration and have students construct their own robots. Perhaps they could even create their own instructions, another way to teach about sequences/algorithms.
  • Cool Creations in 35 Pieces by Sean Kenney. This book has several robot designs. You can purchase the 35 pieces on this website. What might be interesting is using the robot creations to create a short film/stop motion, after designing and creating their robots students could create a storyboard sequence and then use a green screen app to produce their short film.
  • awesome lego
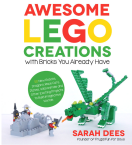
Awesome LEGO Creations with Bricks You Already Have by Sarah Dees. Another useful LEGO book featuring several robots to inspire students to get creative with design and make their own. Build some math activities into the project, perhaps collating and graphing data about the blocks used or set a criteria challenge and limit what they are allowed to use.
  • Papertoy Glowbots: 46 Glowing Robots You Can Make Yourself! by Brian Castleforte. This book looks like loads of fun and Papertoy-Glowbots_covercontains enough robots for each child in your class. You could easily merge this text into your Science program about light or use it as inspiration for a Design and Technology project. **Please note: there is a warning about potential fire hazard for some projects, make sure you go over any safety issues with your students and have a plan in case anything should occur (ooh…another Health lesson, fire safety).

Well, this robot needs to power down after developing RSI from working too long on the computer. I haven’t even looked at the great non-fiction robot text available, perhaps next time. Just a little shopping tip before I go…

My favourite site for searching for books and the best price is booko.com.au, it gives both the cost and delivery postage rate for most online books sellers. The Book Depository, Abe Books, and Booktopia are usually the cheapest option for us Aussies. Happy reading!


This Far, with Little Coders.

In session one, ‘How Far with Little Coders’, students were investigating just how far is 5 and ten Ozobot steps? Once we had acquired this knowledge we could move forward and challenge ourselves. The challenge criteria is opened ended, the solution will be different for each group and students have choice in their design and construction process. So, what is the challenge?

Session Two

The challenge:

  • Create a track for the Ozobot to travel, using graph paper, masking tape and straws.
  • Calculate the distance to travel through each section of your track.
  • Use the Ozoblockly editor to create a sequence to allow the Ozobot to travel the full length of your track, from start to finish!

Tips to Remember:

  • Fold along one edge of the graph paper, match the folded edge on one sheet to the graph line on the second sheet. Tape together on the reverse side. *I did this for my students, under their guidance as to their design choice. Older students should be able to manage themselves.
  • Cut the straws into different lengths to make an interesting track.
  • Use small pieces of masking tape to hold down the straws, make sure the tape will not interfere with the travelling Ozobot.2016-11-15-14-02-46
  • Make sure you allow enough width across the track, so the Ozobot can travel freely.
  • Include degree codes to turn direction.
  • Refer to your prior test results, how many graph squares/cm is in 5 or 10 Ozobot steps? How many code blocks do you need to use?
  • Count the graph squares carefully to calculate which code block you need to use. Use a pencil to mark each code block distance on your track. Use this information to select the correct code blocks, and form your sequence.
  • Test run along the way…calibrate the robot, then load the sequence.


Most students took two sessions to complete the task. The first student to finish was a girl! Go, coding girls! In my experience, across the 1-10 Years/Grades, girls do seem to have the stamina to persevere and problem solve, the boys will often give up and enthusiasm wanes when they can’t solve problems quickly. With this activity, everyone was engaged and kept trying to get to the finish line. There was cheers of joy, clapping and congratulations when students succeeded. There was also tears of frustration from one little man, who passionately wanted to do well, but struggled with his low math ability. A little pep talk, some teacher help and he was back on track.

When you select the student partner groups, pay attention to the student’s strengths, try and pair them so one supports the other. It will reduce the frustration and hopefully there will be no tears. The word challenge is very real in this activity, I am working with six and seven year old’s, and I am pushing them. Am I asking too much of them? Perhaps, but they are learning from the challenge, building stamina and developing thinking skills, plus finding pride and joy in the accomplishment. Oh, and celebrate the achievements, send them off to show others of what they can do…show the office staff, the principal, the gardener, the class next door, and spread the joy!


How Far, with Little Coders?

Are you counting sleeps? I am. So, little time to get everything finished up for the school year. In this silly season of assessment, reports, presentation practice, graduation events, school year books, class groups for 2017, swimming lessons, sports carnivals, job uncertainty, meetings, tinsel and glitter, we are still teaching and learning.

For myself and my little coders there has been a lot of learning. Earlier in the term, I had the opportunity to attend a great LEGO EV3 Mindstorm workshop in Perth at SciTech. It was a lot of fun, I got to catch up with some past colleagues, and it was challenging. If you have the opportunity to attend a LEGO EV3 event do it, even if you don’t have these robots you can apply the teaching/lesson ideas to most robots. Which is exactly what I did, I modified one of the activities to suit my little coders and their skill level, when working with Ozobots and the Ozoblockly editor.

The activity was to work out how far a LEGO EV3 can travel in one rotation of the wheel. It was an interesting 5 minute investigation, a group of 30 adults were all estimating, calculating, discussing their thoughts on distance. Only a few people in the room calculated the correct distance.

So, I took this little gem of an idea and asked the little coders ‘How far is 5 Ozobot steps?’, ‘How far is 10 Ozobot steps?’. Hhhmmm…no one knew, including me. Now given that I am working with Yr. 1/2 students, I had to make the task achievable. We want a little bit of challenge and investigation, but we also want success and that feeling of pride and achievement. My solution to this was using graph paper, cheap, easy to access (hello, Mr. B, Math/Science Wizard), and we can record our data on it. You need to use 5mm graph paper, the reason being that Ozobots move small distances.

Session One

First, remind students about the Mode 1 block codes in the editor. A quick game of what code is this, using the Mode 1 flash cards.

Then:

  • Explain the challenge. How far (the distance) is 5 steps and 10 steps?
  • Demonstrate on the IWB, the Ozoblockly editor and which code blocks they need to use. You only need a speed block and the 5/10 step blocks. Show the students the simple sequence…speed block, joined to step block. Remind/demonstrate how to calibrate the robot and program the robot (many students forget the steps).
  • Group students into partners.
  • Each group needs: one piece of 5mm graph paper, a pencil and an Ozobot. Plus computer with Ozoblockly Editor.
  • Demonstrate drawing a straight start line on the paper, repeat this 4 times. You should have 4 start lines along on edge of the paper. Under two of the lines write ‘5 steps’and under the other two write ’10 steps’. 2016-11-08-16-21-43
  • Load the program onto a robot. Demonstrate: Run the robot from the starting line. When it stops, use the pencil to mark how far it traveled. Mark off all the 5mm squares covered with that distance. How many squares did it travel? How must distance is this? Discuss measuring in centimeters. How many millimeters in one centimeter? 5mm + 5mm = 10mm = 1cm
  • Have students work through their own investigation, calculating the Ozobot steps/distance. How far did it travel?

2016-11-08-16-20-282016-11-08-16-17-04

2016-11-08-16-16-342016-11-08-13-41-18

Session Two

This is where the fun starts and the challenge becomes greater, but you will have to wait for the next blog post, as it is time for me to go to work. Have a great day everyone.


Challenging Little Coders

Welcome back.

If you remember from my last Little Coders post, I had promised to let you know how we went in the next two sessions. So, let’s talk about how I assessed the students in these sessions.

Session 4 (& 5).  We started, as I always do, reviewing our past skills. A quick game of ‘Who knows this code?’, holding up the Ozobot code block flash cards (mode 1) and having students answer individually. Then we moved on to creating a sequence on the board with our text code cards, like before the students work with me making decisions on what we will include and what we need to complete the sequence (see session 3. for more info). ozoblockly-mode-1

Then we had a go creating the code in the Ozoblockly editor, this was the easy part. Most students can now use the editor very successfully, a few make some simple errors, such as selecting a backwards code instead of a forwards code.


What is tricky is programming the Ozobots on the monitor, to test their sequence. A few tips to teach which are vital for success are:

  • Train the students to check the display brightness, using the buttons on the monitor. It must be set at 100% or it will not load. We work in a computer lab which the whole school uses, and other students will change the settings.
  • Train the student to calibrate the Ozobot before every program load. This is usually the number one reason for failure. You must: hold the button in on the Ozobot until it flashes white, release the button and then place on the screen, hold until it flashes green (yay, it’s working), then it will turn itself off. You are now ready to load the program.
  • Train the student to load the program. They must turn the Ozobot on and release the button before placing it on the monitor. *Do not hold the button down. With the Ozobot turned on and held in place on the monitor, click the load button. The program will load; you know it is working if it is flashing green. *If it flashes red it is not working! Redo the calibration and try again.
  • Train the the students how to run their program. They must learn to double click the button on the Ozobot to run their program. If they only click once it will not run their program.

check-listNext, I got my check list out to record what they could do, and I changed the text code sequence which was on the board. I added a few different codes and lengthened the sequence. The students were asked to create the sequence and I walked around marking off who could do what (the basics). As students finished loading their programs they called me over and demonstrated their sequence using the Ozobots. When we are watching the Ozobot, we are also looking at their code on the monitor and talking about what’s happening. This reinforces the connection of what is on the screen (the code) and what the robot is doing…is the robot flashing the right colour, has it moved forward or backward, is it turning in the right direction, etc? We actively look for any errors. We talk about the errors and I listen to what they say, what do they need to do? Can they identify, fix the error and modify the code independently? You can get a very clear picture of their knowledge. *Note: this is very time consuming, I did not get to view every student, and that is with having an extra staff member in the room to monitor the class and help students with any issues. I ended up assessing over two sessions (4 & 5), with help. Be easy on yourself and break it down into targeted groups for assessment over several classes.

What we are assessing? Basically,  can the student…

  • Use the hardware and software to meet specific objectives.
  • Create a set of sequenced steps, using provided commands for a robotic device, to make them move in an intended manner.


Session 6. This time I make the task more challenging and creative. The students must use the provided basic codes but they have freedom of choice in designing their own sequence in any order they wish. They can add as many steps as they like, choose any colours they wish, make choices about direction (including degrees) and wait time, and light features. I place a selection of basic codes (using the text cards) on the board, and I 2016-10-21-17-59-18
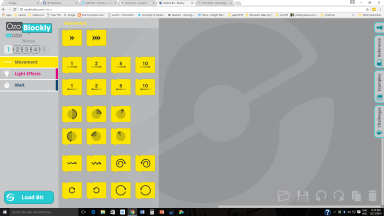
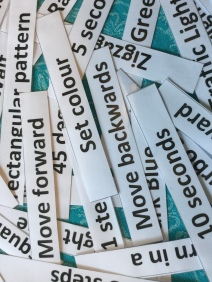
ask the students to create their own sequence using the codes. The text codes include: set colour, move forward, move backwards, turn right, turn left , wait, and turn in a (circle choice). I also write on the board that they must include four special lighting or movement codes of their choice (This makes it more fun, who doesn’t want Christmas tree lights flashing, before you zig zag along?). I also stipulate that they must have between ten and twenty code blocks within the sequence.  They must then load the program onto the Ozobot, test the program and make any modifications, before showing the teacher.

Sounds fun, but where is the challenge? The challenges vary greatly depending on the student, their abilities, their choices and the criteria that you set. For instance:

  • Can they log onto the computer?
  • Can they find and open the software?
  • Can they select mode 1?
  • Can they create/design a sequence using the set codes? *Note: Students could draw/design a plan on paper to create a sequence, prior to them coding on the Ozoblockly editor.
  • Can they identify and locate the code blocks they need?
  • Can they track how many code blocks they have included? Have they used them all and met the criteria?
  • Have they snapped/joined the code blocks together?
  • Can they calibrate the robot?
  • Can they load their program onto the robot?
  • Can they run/test their program? Are they making links/connections between what code is on the screen and what the robot is doing?
  • Can they problem solve when the robot does not run as it should? (Monitor brightness, calibration, loading procedure)
  • Can they talk about their sequence, their code choices and what the robot is doing? *Note: You could have students draw their completed sequence and write what each code means after they complete the task.

Wow, I am exhausted just typing it!

Once again it boils down to our basic skills and knowledge goals: using hardware and software, reading and using a set criteria to create a sequence (algorithm), in order to get our robots moving in an intended manner.


Little Coders…Grow up!

Hey all, I imagine everyone is flat chat busy teaching and assessing for reporting. For my little coders the pressure has also escalated. We have graduated from Ozobot colour code to Ozobot block coding! The students were super excited about this, but it has been a rocky road. For some students just logging onto the computer can be challenging.

For myself, the first two sessions were crazy! Let me just say that again, yep, CRAZY! One teacher helping two dozen first time block coders (some who can’t read well) log on, find the editor, learn the code blocks (Mode 1.), create a sequence and try to program the robots…well, really, it was complete madness. It was one of those moments when I wished I could morph into an octopus or two, I needed eight arms at least.

Luckily for me, my Deputy understood my pain and this term has allocated a wonderful Education Assistant to our DT session. It is still very busy but we are into our fourth session and the students have started to build their knowledge and skills. Our journey so far has been very much one of discovery…

Session 1. We played, it was very much a session on how to use the editor. Having a go finding and dragging code into the editor, exploring what each code might be and what it might do. We tried to make a sequence and with help, we tried to program the robot and run our sequence.

Session 2. More play, building our basic knowledge. Students shared one robot between two. Can we do it ourselves? What do we need to do? Why isn’t it working? What have we done wrong? What do we need to change? Who can I ask for help? *3 before me (ask your partner, ask the student sitting on the other side of you, ask a peer who is good with computers…ask the teacher last! This reduces the teacher dependence and gets them solving problems together.)

Then…two weeks break for the holidays. This I knew was going to be a problem, they would forget most of what they had learnt. We would be starting all over again. So I did what I should have done to start with and we unplugged.

Session 3.  We spent the first half of the session not using the Ozoblockly editor but we did use the Ozobot block code. Hhhmmm, how did we do that?

2016-10-21-17-53-38
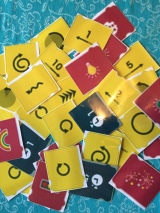
On the holidays I spent half a day making some block code resources. I screen shot images of the Ozobot Mode 1. codes and pasted them into word. I cropped and adjusted the size of each block to make larger blocks which could be read when blu tacked to the front board or when held up. Then I laminated them and cut them to size ready to play with. I also made some flash card strips with the command codes written on them in text, then enlarged and laminated these as well.

During class we reviewed what each code block was and what it did. I just held up random cards and students told me their answers. Not everyone remembered them all, but that gave other students the opportunity to show what they knew and help their peers.

Then we played robots. I split the class into two teams, my wonderful EA had one group and I the other. We sat the students facing each other (guard of honour style) and gave each student two or three code block cards. We then worked with the students to make a sequence (on the floor), during this time we discussed the order. What we need to start with, which way do we want our robot to move? Which code block will make it turn in the right direction? Do we want to use a special movement card, a spin, a zigzag? After we finished the sequence, one student was chosen to be the robot and respond to the code. The robot could not move unless his team read aloud the next code block. This worked really well, as once again peers helped peers when any errors were made. The students really enjoyed this activity and wanted to keep going for the whole period, but the mean teacher shut down the robot and made everyone log onto a computer. Oh no!

2016-10-21-17-59-18
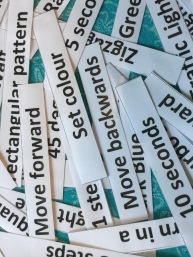
I wanted to see if they could apply this knowledge when they used the editor, so we began activity two. Using and introducing the command text cards I created a sequence on the front board. When doing this I was constantly engaging in discussion about what we might need next and why? I encourage the kids to help me add to the sequence, they enjoy being part of the process and are actively engaged. Once the (text)sequence was constructed on the board I challenged them to recreate it in the Ozobot editor. Most students handled this really well and found the correct code blocks needed. The biggest challenge came with reading the text sequence, but I was pleased to see students walking up to the board to check which line of code (text) they needed next and puzzling it out, sounding words out, and checking with friends. Many asked me “What is after five (or three, four, …)?” Huh? It took me a minute to realise they were counting the lines of code to keep track, perhaps I should have numbered each line of code. Anyway, overall it went well, early finishers were encouraged to modify the code and/or load the program onto the Ozobots.

Hope this is of some value to you. More to come soon, with sessions 4 & 5 (assessment). I am snowed under at the moment with writing job applications (oh the joy of being fixed term), and assessing and reporting.

Note: I will try an add the code block/text doc (in resource page) when I have more time. If you are desperate for a copy (Draft-rough and ready) email me.


Binary Blitz, a 0101!

Learning about binary code can be daunting for some students. Some kids will switch off when they realise it is Math! “Why are we doing math in coding class?” was the cry of outrage put to me during Friday’s class. “How come we aren’t working on the computers?” was the next question. It took a lot of convincing that what we were about to do would be interesting and fun. And fun it was, so much fun that I felt it was one of the best classes we had had. A 0101 (5) out of 0101 (5) or five star class. Everyone participated, they all enjoyed the challenge and we all learned something new, staff included.

We worked on unplugged activities, no electronic technology needed. Who needs a computer or device when you have hands?

We started off by watching two short videos available on YouTube (Ok, so there was a little bit of technology involved). There is a lot of different videos available to watch which teach the basics of binary code (Base Two). You do need to watch a few yourself to see what will work for your class. This is why we watched two, differentiation, meeting the needs of all my students. The first one we watched was ‘What are binary numbers?‘ with James May, I thought the celebrity status would help. They all know James May from Top Gear, but at the end of the video I got comments from some students “I’m confused” and “That was too confusing.”. Hence, video two ‘Intro to Binary Numbers‘ a very simple and visual explanation.

We then discussed the concept and I drew how binary numbers worked on the front board. One of the things which confuse the kids is that the numbers run right to left, not left to right, they need to see this. I then used a set of dot cards on the front board to demonstrate how it works. You can get the binary card PDF and activity ideas from the csunplugged.org site. I enlarged the individual cards to A5 size and made up seven sets, printed, glued onto coloured card and laminated.

Once the majority got the hang of it we got our textas out and drew the binary numbers on our fingers. Who doesn’t like drawing on their hands? The trick with finger binary activities is the direction, the kids must write the numbers on the correct finger and facing the right way. The problem is which way is the right way, many of the finger activities online have the hands facing a different direction. You need to pick which way you want to go with and stick to it. I used palms out to audience which means the number one is on the pinky finger. A good example of palms out can be shown here.

Image from Rosio Pavoris’s blog (link above)

binary-finger-numbers

Binary fingers image from Rosio Pavoris blog

We then played several games to get our heads thinking and working with binary numbers. First up I called out numbers for the class to make, they held up their fingers to show me the answer. Be aware that with older students’ number 4 becomes very popular. We all had a 15948105702_58bb9ec283_z
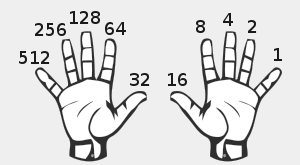
good laugh over this, tried it out on each other (this may be the only time that you can demonstrate your true feelings) and moved on. Then we paired up and challenged our partners to make various numbers. I then handed out the binary card sets to each group; it gave those struggling with the finger binary an easier visual method. While the class was practicing using cards and fingers, I went to each group and checked if each student understood the process and could demonstrate for me. This was lots of fun and the students enjoyed showing off their new skill.

The next challenge was writing the numbers in binary, ones and zeros. I called numbers from the front, they made them using either cards or fingers and then told me how to write it on the board in binary code. For instance,

10 = 8 + 0 + 0 + 2 = 1010

13 = 8 + 4 + 0 + 1 = 1101

Next we had a competition seeing who could calculate the numbers the fastest, our Education Assistant working with our Auslan student won!

During our next class we will keep working on converting decimal numbers to binary numbers, writing them as binary numbers and then explore the alphabet in binary (ASCII). It should be just as fun.

There are many different binary code/base two teaching and learning ideas and resources available online for you to use, here is a few that I like:

Evolution…Ozobot talks!

Ok, so they may not actually talk but they do make sounds! The new Evo Ozobot looks awesome. For those of us who are already Ozobot fans and educators, this is super exciting.

ozobot-evo-box-packaging-a418abd2The new Evo has sensors which allow it to interact with objects in the environment, it has new lights, a speaker, can make sounds to suggest emotions and allows users to communicate through social media. You can use the Evo with tablets and smartphones. Much like our old favourite 2.0 Ozobot it can be programmed with either colour codes or block coding. New codes have been developed to match the new features, students will enjoy adding sound to their programming.

The sad thing is that us Aussies are not yet able to purchase an Evo 😦

There is a preorder set up on the Ozobot website, however, when trying to place an order from Australia you are hit with a $100US shipping fee! I think you will find that even if you have the money to pay they will notify you that they don’t ship to Australia (as happened to me previously). Let’s hope that Edtech get in on the action quickly and makes them available here.

If you would like more info about the Evo check out the links below:


Assessment D.T. tasks?

Digital technology assessment? Hmmm, so we are teaching great stuff, the kids are loving it. You are learning new skills, the school has invested money for new resources and if you are lucky some great PL opportunities. You may even have had D.T. incursions or excursions, visiting robots certainly add to the buzz! The D.T. unit you developed for the term was a success, the Principal is impressed and the parents can’t stop talking about it. But really the whole point is the result, did your students achieve what was expected?

They may have mastered how to use ‘Scratch’, created a game and had lots of fun in the process, but how do you collate and record what they did when it is all digital? And are they really using computational thinking if they are just following the provided steps and dragging block code onto an editor? We may think we are teaching D.T. by engaging with these resources but perhaps we are not really challenging our students, nor collecting real evidence.

There are many resources out there that are recommended to us as being great for teaching digital technologies. Lots are FREE (Don’t we love that?) and some cost screen480x480us a great deal of money (plus time!), each has value or does it?  For example, I have used Cargo bot with a previous class. For those of you who haven’t tried it here is a video to give you some idea of how it works. It is a great app to demonstrate the use of symbolic code and it can be very challenging. In fact, so challenging that you become frustrated. For our high school students, this resulted in many students off task or students cheating by googling how to solve the various tasks/levels. Well, we did want them problem solving!

If we have to provide evidence of a student’s skill and knowledge of using this app for assessment purposes, what are we going to say? Student A got to level 3 and student B reached level 8, so student B clearly understands symbolic code, pattern and repetition (iteration), or perhaps student B is just better at googling the answers?

Let’s talk about using Ozobots. As you know I am a big fan of these little robots, to the point that I bought my own to play with before introducing them as a teaching device. The Ozobot website provides many lesson plans and workshops. There is challenges along the way and something for every age group (K-12). I have used many of the provided resources, and they are great, but still, I felt that collecting evidence of a student’s true computational thinking abilities is not always evident. Students often help each other, which is a skill we are looking for, collaborative problem solving, but when it comes to assessment for reporting it is individual. One of the ways I have been dealing with this is by modifying the supplied Ozobot lesson plan/workshop. For instance, there is a simple worksheet activity which has students draw a simple compound shaped track and then write the code needed to program the robots. Yes, I said write, a little bit of practice writing code and some evidence collection. With me, the students only attempt this after library_shapetracer-basicthey have become familiar with the basic online editor games, Shape Tracer and Shape Tracer 2.

After finishing the simple activity sheet, I set them a new task. Using graph paper and textas they must draw their own track. I set a few rules:

  • there must be seven or more objects on the page (much like a birds’ eye view of a map-buildings)
  • they must have colour changes within the route (the robots flash various colours)
  • the robots must travel around the buildings/objects
  • they need a start and finish point or they may create a loop (iteration)

I keep it simple as what I am really after is what follows. The students create very different tracks, some are very simple and some extremely complex. I then set the next task which is writing the code (sequence = algorithm) for programming the route. They have their original worksheet to refer to which has a section with the correct coding terminology and choices, such as ‘right turn 90 degrees’, ‘slight left turn 45 degrees’, etc. This helps support the students, they don’t need to concentrate on the terminology, they need to focus on reading their route and finding which code they need for their programming to run successfully. For assessment purposes it gives me an indication of whether they understand the different codes, if they can problem solve by selecting the correct code, add the extra information needed (i.e. number of steps, etc.) and create a sequence (algorithm).

The next step is block coding their written code onto the computer, we use the Ozoblockly editor to do this. Once again students need to demonstrate that they can read/understand editortheir own code, they drag and drop the block code into the required sequence (algorithm). They then program the code onto the robot (from the computer monitor) and run the programmed robot to test if their coding is correct. Here is where they find errors and correct their coding (both online & on their paper coding).

So what have they learned and what can we assess from this activity? Quite a bit, here is a few areas (from various grades) which we have covered:

  • Different types of data, and the same data can be represented in different ways (ACTDIK008)
  • Data is represented using codes (ACTDIK015)
  • Design, modify, follow and represent both diagrammatically, and in written text, simple algorithms (sequence of steps) involving branching(decisions) and iteration (repetition) (ACTDIP019)
  • Implement and use simple visual programming environments that include branching (decisions), iteration (repetition) and user input (ACTDIP020)

Anyone else have assessment ideas to share? What have you been using and doing to collect assessment data?